 Studio: New Street GlassWorks
Location: 35B New Street
Worcester, MA 01605
Website: www.worcester.edu/WCC/
Rating: 5-stars
Last night several friends and I participated in Friday Night Fun with Glass Blowing: Saint Paddy’s Beer Glass with the Worcester Center for Crafts/New Street GlassWorks. Both the Center for Crafts and New Street GlassWorks are affiliated with Worcester State University. The New Street GlassWorks is equipped with a glass furnace that keeps 400 pounds of clear glass melted and ready for instant red-hot use. Three "glory holes" are cranked up as needed for glassblowers making use of the hot shop. There’s also a cold shop, a mold shop, a flat shop, six rental studios and a flame working studio.
The cost for our class was very reasonable (about 80$) and it was a fun way to spend a Friday night with friends. Our instructors were Caitlin V, Emory and Ian. After a quick safety lesson, description of the tools and equipment, Caitlin got to work demonstrating what we would soon be doing ourselves. They regularly reminded us about safety because of how easy it is to get burned. If you are not careful with molten glass heated to about 2000˚ it isn’t hard to see how you could get burned given how closely you are while were working with the materials.
We had two options; we could make a colored beer stein with a handle or we could make a clear beer stein with a green shamrock. I decided on the clear beer stein since I didn’t want a handle and I thought it would be cooler to have a clear glass to see my beer in.
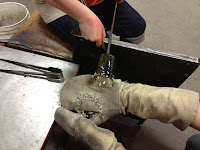
I went first and I was paired with Emory as my instructor and assistant. Emory had a great personality and immediately put me at ease. The first step of glass blowing is to use the blowpipe to gather molten glass from the furnace. Then we rolled the glass on the marver to create a cooler skin on the exterior of the glass allowing us to be able to mold it easier. As the glass cools we reheat it using a glory hole until it was glowing red between each step. Next we lightly blew air through the blowpipe to create a bubble in the glass. I learned from Ian that it isn’t the air but rather the moisture in the air that expands and causes the glass to balloon. We then start by scoring the glass just past the blowpipe using the jacks. This will allow us to separate the glass from the blowpipe later. After scoring we continue to inflate the bubble and mold the shape using blocks which are ladle like tools made from fruitwood that have been soaking in water. We begin to create a cylindrical shaped bubble by using the jacks to smooth the bubble as we shape it with the blocks.
With the bubble now large enough it is time to add the shamrock. We do so by simply sticking our bubble in the garage where the pre-heated glass shamrocks have been baking and pressing the bubble down and picking up one of the shamrocks. We continue to use the blocks, jacks, and glory hole to merge the shamrock and our bubble together. Once we are satisfied that the shamrock and glass are combined we add more air to our bubble and inflate it further. To lengthen the height of the cup we then swing out bubble like a pendulum causing the bubble to stretch.
Now we must separate the glass from the blowpipe. But first we must create a flat bottom of the glass where we attach it temporarily to another rod called the punty. We use a paddle to create this flat spot by further inflating the bubble while we gently push against the bubble with paddle to create a flat spot. Again we use the glory hole to keep the glass hot. To attach the punty we must first user it to gather a small amount of glass which we then roll on the marver. Once we have created a small cylindrical nub we use the tweezers to position it directly in the middle of our flat bottom. Once attached we cannot break the glass off the blowpipe.
This process one of the most difficult according to both Emory and Ian. This is where many novice glass blowers break their glass. They will assist me through this process. Using the tweezers I collect water from the bucket and where I had previously scored the glass using the jacks I quickly put the water. This cold water instantly caused a reaction in the glass and created our break point. Using the handle of the tweezers we lightly tap the blow pipe and the glass should and did pop right off leaving an open end to my glass.
Now we re-heated the glass in the glory hole again and using the jacks begin to stretch the opening out until it make s a glass shape. Once we smooth the edges out and we are satisfied with the glass a simple but deliberate tap to the punty causes the glass to drop off into the oven mitted hands of Ian.
Now begins the waiting game. Sadly there is no instant gratification. The glass is put immediately into the annealer where is must cool the glass slowly over a 24 hour period. This will keep the grass from cracking due to thermal stress. Hopefully tonight I can get over to the studio to pick up my glass.
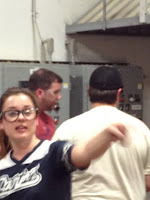
Our instructors
Emory Ian Caitlin


No comments:
Post a Comment