Social Icons

Showing posts with label Cooking. Show all posts

Saturday, October 11, 2014

Jura Micro Ena 9

As many people know I had a part time job at Sur La Table. It started as a seasonal distraction and turned into a more long term part time job. I worked all over the store in every department but the area of the store where I spent most of my time in was at the coffee bar.

It was my favorite not because I am a big consumer of coffee drinks but because I had an ability to sell just about any machine to just about any customer.  I sold many Nespresso units but I also sold a fair number of automatic machines. Out of all the machines we sold there was only one that I would buy if I ever decided to get a machine. That machine was the Jura Micro Ena 9.
 
The Jura Micro Ena 9 is touted as the world's smallest One-Touch automatic cappuccino machine. Its operation is so straightforward that it can be summed up in two words. Press - Enjoy. It can make a multitude of beverages with a  single touch from your basic espresso and coffee to your more complicated cappuccino & latte macchiato. The best part is that you can have any of those at the touch of a button with out ever having to move your cup.
 
Its amazing to me how much technology is packed into such a small stylish unit. Its programmable features such as volume, temp, strength are all done through a single simple interface and rotary switch. It has an aroma preservation seal to keep your 4.4 oz of beans fresh. It has a Clearyl Blue filter to ensure the purity of the 36.8oz of water used and can make 9 beverages before needing to have the grounds removed.  For those who are energy conscious is has a zero energy switch and can go into a programmable energy save mode.
 
Each beverage the beans are freshly ground in the multi level conical aroma grinder before entering the high performance thermoblock heating system and then being dispensed under 15 bars of pressure. It also has a shoot for pre-ground coffee if there is someone out there who must have something different. If you are having a milk based beverage the milk is dispensed from its cool control cooler into its own state of the art fine froth technology tips producing a rich and creamy milk. No matter what the size of the beverage the spout is adjustable from 2 to 5.4 inches to allow your cup to fit underneath. The best part is that when its all over it will automatically rinse its self internally including the milk system. It will also do a more robust full clean and descale when necessary at the touch of a button.
 
I decided it was time to treat myself. I was going to make one final big purchase at Sur La Table before leaving but with a little research I discovered I could actually pick one up for even less then I could with my employee discount. So as an early Christmas gift to myself I ordered it online and even got the cool control container for the attached milk at about 60% off. I was a little nervous that they might be refurbished units. 

When it finally arrived I nervously opened the box wondering if  I had made a bad decision.  I couldn't have been more happy since they were clearly brand new never opened boxes. It won't get a lot of use so it should last me a good long while. I got it at a great price too so I feel good about my acquisition.

Saturday, September 27, 2014

Apple Picking at Tougas Family Farm

An apple a day ..... Keeps the doctor away or so goes the saying and after the 33lbs of Apples picked at Tougas Family Farm in Northborough I'll be eating at least one a day for a while. Apple picking is one of those must do things in the fall and its always a fun experience.

With the variety of farms in the area we selected Tougas Family Farm because of the variety of apples they grow, the reputation they have, and the proximity to where we live. Its a quick simple ride and right off the highway in Shrewsbury, MA. It was also named one of the Ten Best Apple Orchards in Country by Woman's Day and one of the Ten Best pick your own apples by USA Today.

They have a huge parking lot clearly labeled which is a good thing since the crowd of people we saw when we arrived was shocking since we had arrived early. There were  already significant lines to gain entry into the orchards through their small red barn. We lined up with everyone else and the mood seemed energetic and with the sun shining brightly why not be excited to enjoy the fresh air and some great apples.

At 10:00 sharp the doors opened and the lines seemed to move quickly with each group picking the size back they would fill. There were two options a Peck ~ 10lbs was $25 and allowed up to 4 people into the orchard or a 1/2 Bushel ~ 20lbs for $35 which allowed up to 6 people into the orchard.The idea was that you could pick as many apples that will fit in the bag they gave you. The larger back was significantly bigger then the small and since we planned to make a few pies  we selected the 1/2 bushel. After paying we made our way through the gates to the orchard.

The apples that were ready to be picked were on the far side of the orchard and you had two options to get there. By tractor pulled cart or by foot. Since everyone else was in line to take the tractor we decided to walk. As we made our way to the picking area we walked through row after row of apple trees. Each and every row was labeled with the type of apple being grown. That made it easy for lay people like us to figure out which apples we should pick. Also helpful was the chart on the side of our bag telling us which apples were best for eating and which were best for baking.

There were several types of apples ripe for the choosing and they included Jonagold, Empire, McIntosh, Macoun, Crimson Crisp, Fuji, Gala, Cortland, Mutsu, and Honeycrisp. As we wandered the rows of apples looking for those perfect specimen's to add to our apple pies we sampled as many of the different apples as we could. Some with sweet while others tart. some were juicy and others more dry.  I loved the Honeycrisp's as they were described as explosively juicy. We tried to stick to the guidelines for what apples made good pies while picking and it didn't take long before we had a full bag and full stomachs.

Again we had the option to ride back to the barn by tractor or walk. We stuck to walking and it felt much longer a trip on the way back with a bag about ready to explode with apples. Once we cleared the gate of the orchard we put them in the car and returned to the small village of barns for some home made apple cider doughnuts and fresh apple cider.


I love apple cider doughnuts and these certainly didn't disappoint. The apple cider was equally as good and refreshing. Once done we walked through the other buildings admiring the pies for sale before heading out ourselves. They also had a complementary apple recipe packet for anyone to take. You can download it here.


After a great day picking apples it was time to bake some pies. We purchased 6 ready made pie crusts by Pillsbury and enough sugar, cinnamon, nutmeg and flour as necessary. Once home we began the long process of peeling, cutting, coring our apples. Well it wasn't really that hard since we had the right tool that did it all for us. All we had to do was crank and then cut up the spiral but apples.

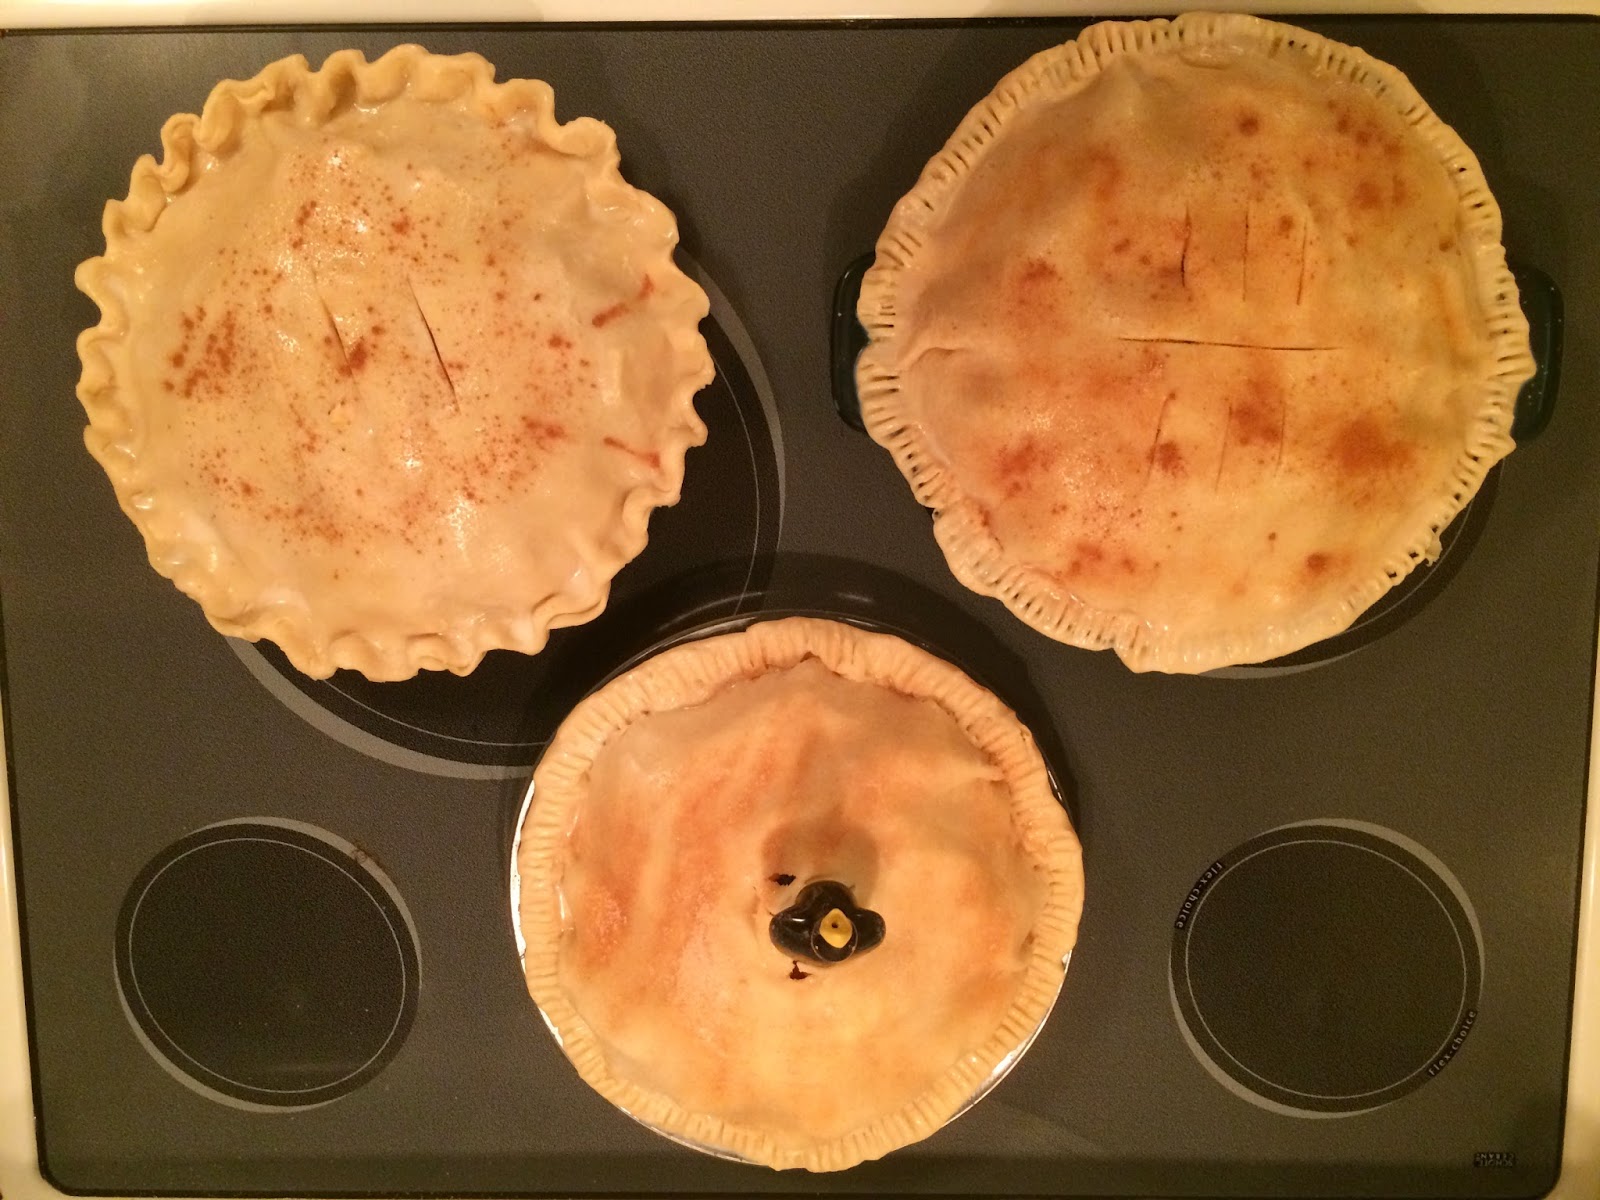
Then we combined sugar mix which is a ratio of 1/2 cup flour with 1 tbsp. of flour and 1/2 tbsp. of cinnamon and 1/2 tbsp. of nutmeg. Once thoroughly combined we coated our apples liberally in the mixture. That sugar coated apple combination we then stacked generously into our pie plates creating a nice mountain of apples. Next we rolled the second pie crust on top and using our thumbs and forks we sealed the two crusts together. We also added some vents to the top of the pie to let it breath. In the old days you would use a pie bird to let the steam out.

We placed our three pies in the oven art 350-degrees for about an hour and tested bu putting a knife into our apples they should be tender and soft. That was it we made three pies and had left over apples from that 33lbs bag of local farm grown apples. we couldn't wait to sink our forks into a slide with some vanilla ice cream on the side. They were delicious.


Saturday, April 26, 2014

Task 42 - Take a Cooking Class (Date Night - Romantic Italy)

Class Description: Bring your favorite date or friend and together combine ingredients to produce incredibly authentic, rustic and refined flavors of Italy. Under the instruction of our in-house chef, you’ll learn a variety of techniques. Prepare a savory appetizer, learn tips for cooking chicken, create a pan sauce, make a delicious side and finish with an incredibly decadent cheesecake. Savor the abundant flavors and learn simple preparation techniques so you may create a sumptuous Tuscan menu together at home.

Menu: Polenta Bites with Gorgonzola and Olives – Prosciutto-Wrapped Chicken Breast with Lemon Sage Cream Sauce – Broccoli SautĂ©ed in Wine and Garlic – Honey-Ricotta Cheesecake


Instructor: Jeff Kaye


For my birthday I decided to take another cooking class at Sur La Table. I have taken many before and always had a great experience and thought it would end a great day of fun at the circus. A few of my co-workers decided to join me and we selected Date Night: Romance in Italy because its menu sounded delicious.

The menu started off with polenta bites with gorgonzola and olives. I am not a fan of olives so this wasn’t really something that sucked me in but the Main entrĂ©e of prosciutto-wrapped chicken with a lemon sage cream sauce more than made up for it. For a side we would make broccoli sautĂ©ed in a wine and garlic sauce and to top it all off one of my favorites a cheesecake. Not just your typically cheesecake but a honey-ricotta cheesecake.

This class was taught by an instructor I had not yet taken a class with before. His name is Jeff Kaye and his background includes being a chef at several restaurants such as MetBar and Grill, Watch City Brewery and chef/owner of Fava Restaurant. In addition to his professional career he is an instructor at Cordon Bleu’s Boston Campus. 

After washing our hands and a brief introduction by Chef Kaye we got started right away on the first task. Some believe that desert is the best part of a meal and as such that is what we started with. No we didn’t eat it first but we did start our cheesecake since it takes the longest. The key to a great cheesecake is allowing it to set and as such it was the first of the courses we needed to prepare.

To help speed the process Chef Jeff had already prepared the graham cracker crust. The process isn’t difficult. You crush your graham crackers up and mix in melted butter. Form an even layer at the bottom of your spring form pans. Then bake the crust for 8-10 minutes to lightly brown it.

While it’s baking you want to mix the remaining ingredients. Using a mixer add the ricotta and blend until smooth. Then add the cream cheese and sugar until smooth. The last step is to add the honey and orange zest. Once everything is combined and smooth. Pour mixture into your prepared crust. Bake for 40-45 minutes at 325-degrees. Center will be slightly giggly. It will stiffen while cooling.

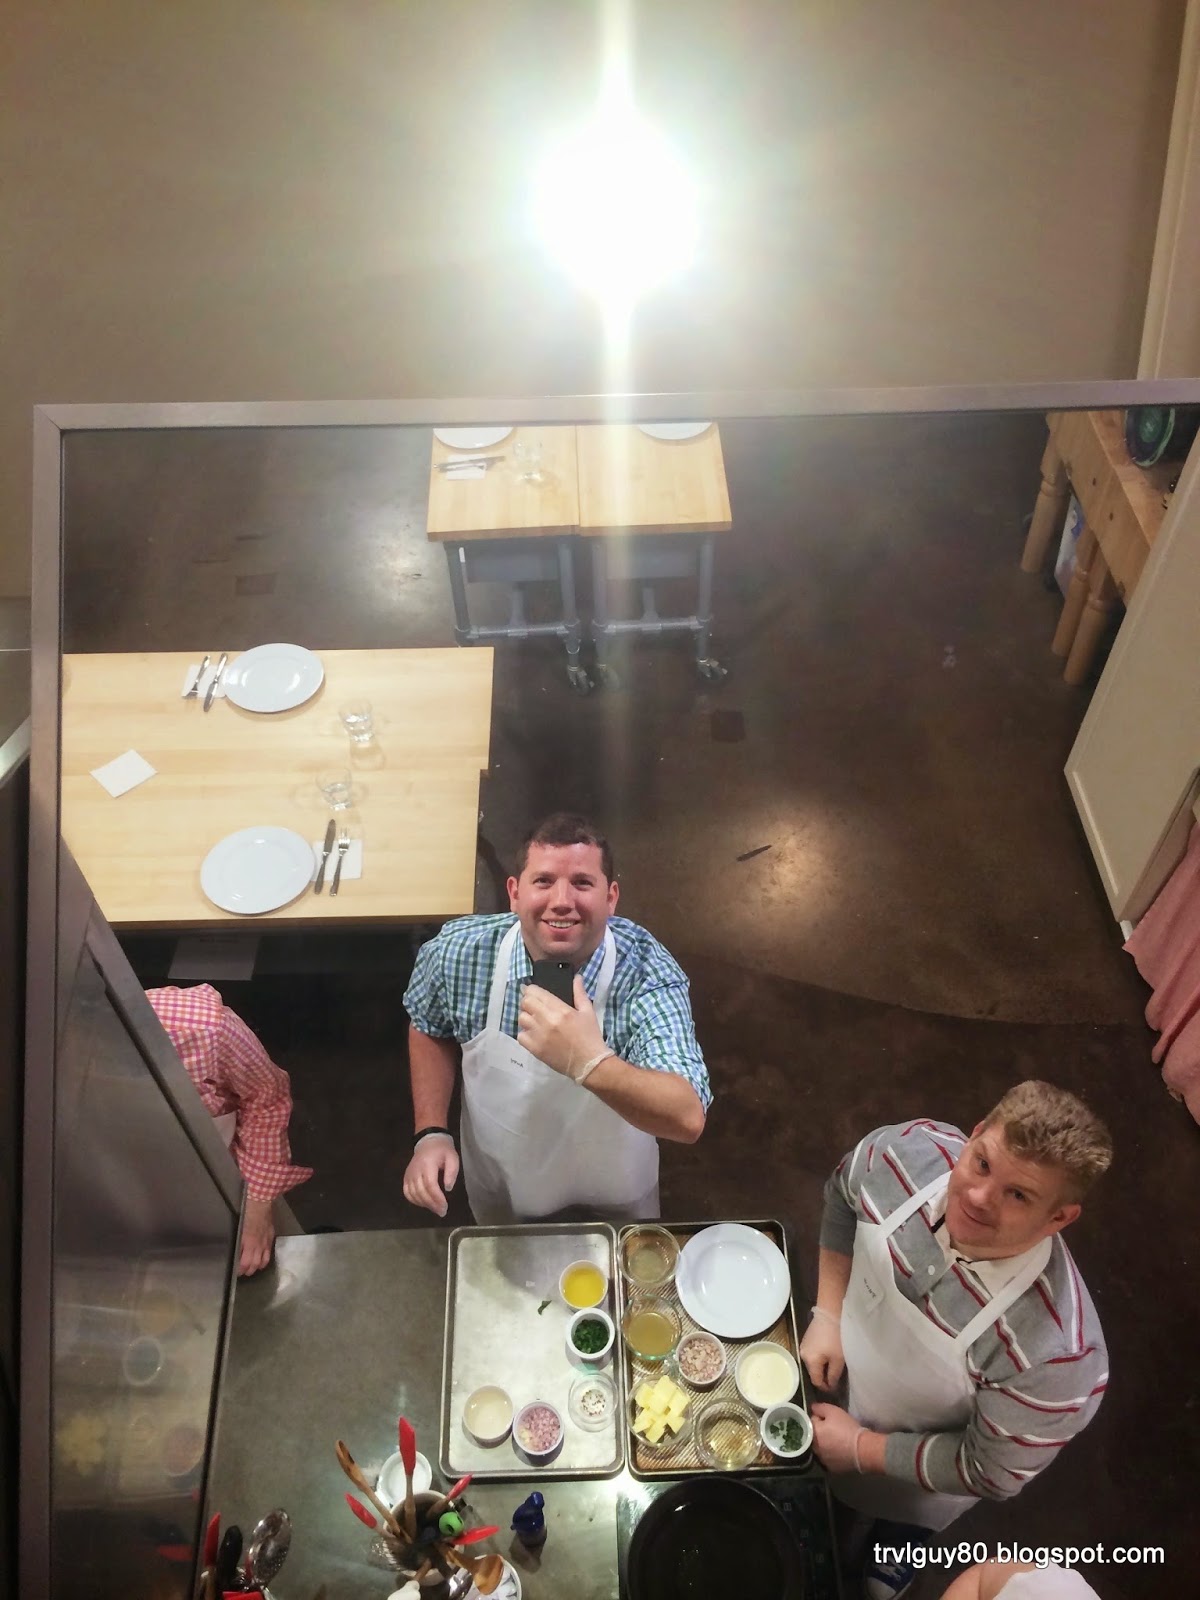
Before starting the appetizer Chef Jeff took a few minutes to review proper knife handling. He taught us proper technique and also a few tricks. Once comfortable we began prepping all of our remaining ingredients so when we begin cooking we wouldn’t have to stop to cut our vegies. This process is called mise en plas. It’s a French term for “putting in place” all the ingredients. Once done we organized all the ingredients on separate baking sheets and set all but one aside.

We started next on our polenta bites with a gorgonzola and olive tapenade. Polenta is one of those things that is very easy to make. You start off bringing your vegetable broth to a slow rolling boil. Then you slowly whisk in the polenta to avoid lumps. Once combined you keep stirring until the polenta has absorbed all the broth and begins to pull away from the sides of the pot. Once done we took the finished mixture and evenly distributed it across a baking pan. We let it cool in the fridge while we started our tapenade.

The tapenade is something I would totally change. I hate olives and this is very heavy on the olives. Using the food processor we combined our garlic, sun-dried tomatoes and olives in the bowl and pulsed until the ingredients were roughly chopped. Then we began adding ¼ cup of olive oil and pulsed to combine. 


The final step was assembly. We used a square cookie cutter to form small bite size 2”x2” squares of polenta and topped them with the olive tapenade. Rather than wait until the end we took that opportunity to sample our first course. I topped my polenta bites with just a little gorgonzola. I won’t lie but these were not my favorite. They needed something but I’m not sure what.

After finishing the appetizer course it was a perfect time to take a break. While we explored the store the kitchen staff was cleaning up our mess and prepping for the main course. Chef Jeff joined us and showed off some of the tools he was using and explained what made one better then another. 

After about 15 minutes we returned to the kitchen and jumped right into our main entrĂ©e preparation. We started by working on the sauce. Every good pan sauce starts with butter and this entrĂ©es lemon sage cream sauce is no different. Using a saucepan we melted the ½ the butter over medium heat and then added our shallots and cooked until softened. Once soft we up’d the head to medium-high and added the cream, wine and broth. Once boiling we lowered the heat to medium and simmered the liquid until it reduced to about 1½ cups from the starting 3 cups of ingredients. Once reduced we removed it from the head and added the remaining butter and incorporated. Right at the end we added the chopped sage and lemon juice. We put aside on very low head just to keep it warm.

Next we seasoned our chicken with salt and pepper before wrapping each breast in a strip of prosciutto in a spiral. Then using canola oil we seared our chicken wrapped in prosciutto until nicely browned. Then we put the chicken on a baking sheet covered in foil and baked in a preheated 350-degree oven for about 15 minute of until the chicken wrapped prosciutto reaches 165-degrees.

While the chicken was baking in the oven we started our side. Our side for the evening was a broccoli sautĂ©ed in wine and garlic. To cook the broccoli we started with a large pot of water as “salty as the sea” on medium heat. We boiled the broccoli for about 3 minutes before draining it and blanching in to stop it from cooking any farther. You want your broccoli to be tender but not mushy.

In a skillet we cooked our shallots in a little canola oil until softened. Then we added the garlic and cooked until fragrant. Next we took our broccoli and added and tossed it until well coated with oil and garlic. Next we added the chili flakes and white wine and cooked until the sauce reduced by ½. We removed it from heat and added lemon zest and juice and parsley and tossed until combined.

The final step of the process was to plate the meal. We put our chicken and broccoli on the plate and put a healthy ladle of our lemon sage sauce over the chicken. We then all sat down and enjoyed the fruits of our labor. Everyone was in agreement that it was delicious. This is definitely a sauce I will make at home. It was quick and simple and extremely tasty.


Our dessert was served next and it was topped with fresh raspberries. While also very flavorful and delicious it didn’t quite set to its optimal firmness and as such was a little loose in the center. It is definitely a dessert I will give another try because I enjoyed the flavors but I would modify the recipe to make individual size cheesecakes instead of a larger one.

While the class started off a bit awkwardly Chef Jeff rose to the occasion and got all of us involved and interested in the process. While we enjoyed our desserts he recapped each recipe and added a few personal tidbits to help us repeat the menu at home. It was a great experience and I will be sure to take another classes hopefully sooner than later. 

Friday, April 4, 2014

DIY: Pot Rack

Kitchens are one of the most important rooms in any house and people often argue that they are not big enough and that is definitely the case for me. It's not that my kitchen isn't a perfectly acceptable size given the total living space of my condo but I have a unique opportunity to purchase high quality kitchen tools at a significantly reduced price from my part time job. It is a result of that circumstance that I have filled my kitchen with all sorts of great kitchen tools. My large half round hanging pot rack quickly filled to capacity with Ceramic Titanium Non-Stick Scanpan CTX Cookware.

That pot rack however wasn't large enough to hang all my new cookware. I ended up with a few large pieces that just didn't fit neatly and were too nice to be hidden away in a cabinet. It left me wondering if I should replace my current pot rack with something larger or add an additional one.

This Old House Concept
I decided after researching that I really didn't have the room for a larger version of the one I already had and I didn't have the space to add additional rack. I decided instead that my only option was a bar style rack mounted to the kitchen side of my breakfast bar wall. I searched high and low but found nothing that I thought would work for me at a reasonable price point. While looking I did come across an interesting DIY pot rack project on thisoldhouse.com. The scale was too large for me but the idea was perfect.

With the concept in mind I set off to Home Depot/Lowes to gather the materials necessary to make the simple bar of galvanized pipe. I picked up a 36" galvanized pipe, 2 Street-90 elbows and 2 flanges. I also picked up a small box of heavy duty stainless steel screws I would need to secure it safely to the wall and 4 heavy duty s-hooks to hang my cookware from. I learned quickly that it wasn't an inexpensive project. When I made it to the self checkout I realized quickly that I had over $70 worth of parts.

I got home and assembled my planed configuration. When I held it up to the wall I couldn't have been more pleased with the size, scale and look of my DIY pot rack. After some quick measurements I marked the wall and screwed the flanges to the wall. I hung my extra cookware and was very pleased with the final result. What do you all think?


Thursday, February 28, 2013

Task(54) – Make a Key Lime Pie from Scratch

(54) – Make a Key Lime Pie from Scratch

While I was at Market Basket getting fruit for some smoothies last weekend I found some real key limes. Having found real key limes made me crave a slice of key lime pie, so I picked up a bag and the rest of the ingredients to whip up my favorite dessert.

The recipe is super easy and it takes just a few ingredients. The shopping list is as follows:

1 (14 Ounce) can sweetened condensed milk
½ cup key lime juice
1 teaspoon grated lime zest
2 egg yolks
1 egg
1 (9 inch) prepared graham cracker crust
2 egg whites
4 tablespoons white sugar


Step 1: In a medium bowl, blend together condensed milk, lime juice and zest. Mix in Egg yolks and whole egg. Pour mixture into crust, then cover and refrigerate.

Step 2: Preheat oven to 350˚ F 

Step 3: To make Meringue: In a large glass or metal mixing bowl, beat egg whites until foamy. Gradually add sugar, continuing to beat until whites form stiff peaks. Spread meringue over pie, covering completely.

Step 4: Bake in preheated oven for 15 minutes. Chill before serving.

Sadly the pictures don’t show how good it tasted. In fact the whole pie is already gone. I did share it with my brother while he was over.


Tuesday, February 26, 2013

Task 64 - Create a Cookbook

While working on my family tree and attempting to compile some family history I knew I wasn’t capturing everything. There is always more to a person than the history books and records can collect. They don’t capture the essence or the personality of a person. Those details are often hard to remember and often forgotten from generation to generation. Sometimes the greatest gifts a person has isn’t something that is recognized as an inheritance because it isn’t monetary. I struggled for a way to try and piece some of those details together but the idea struck me as I sat down for dinner at my parents. 

My mom had made her amazingly delicious corn pudding. While it isn’t a fancy dish it is always included in every holiday meal or special event. I know I had asked my mother before for the recipe but it wasn’t until recently that I discovered its origin.

She hadn’t dreamed it up or adapted it from a cookbook as I had expected. Instead I learned that it was a side dish her mother had always made for her. While my grandmother passed away when I was only four and I don’t remember her I came to the realization that a little piece of her personality and spirit is on the table each and every time my mom makes that dish.

It was then I realized that like my mother I too had memories of meals that she made for me. Those meals where made with love and she has spent countless hours nurturing my body and mind with those delicious dished. 

I decided that before it was too late and those meals were lost or forgotten I would collect and combine those recipes into a family cookbook. I asked my mom for both of my grandmother’s cookbooks and learned that they too had written down recipes from past generations. 

I have digitized and printed a copy for myself, my mother, and my brother so that they those recipes will live on for more generations to come. Rather than have it bound I opted to go with 3 ring binders so that recipe’s can be added.


Thursday, February 14, 2013

Task 80 & 82 - Mama Louise's Chicken Piccata

(80) Make Someone Special Dinner
(82) Try 10 New Recipes
Recipe: Mama Louise's Chicken Piccata

Last night in honor of Valentines Day I decided to make dinner for someone special to me. I chose one my mom's best recipes for the occasion and took the opportunity to take pictures of the whole process to share here on my blog.

The recipe is very easy and it takes roughly 1 hour from start to finish to make the meal. The shopping list is as follows:
  • 4 halves chicken breasts, skinned and boned
  • 1 egg
  • 3 tablespoons real lemon juice from concentrate, divided
  • 1 lemon sliced thin
  • ¼ -  cup sifted flour
  • 2 tablespoons capers.
  • teaspoon garlic powder
  • teaspoon paprika
  • ¼ cup margarine or butter
  • 2 teaspoons chicken bouillon cubes
  • ½ cup boiling water
  • 2 servings of angel hair pasta 
So timing is everything and where I have the most trouble when I cook big meals. Last night I managed to get everything timed perfectly and I attribute that to having laid out everything I would need to cook tonight.

Step 1: Tenderize the Chicken. Before tenderizing the chicken I trimmed away any residual fat from the meat. Once I was satisfied I using the textured side of the meat tenderizer I pounded the chicken on both sides. 

Step 2: In a medium bowl beat 1 egg and 1 tablespoon of from concentrate lemon juice.

Step 3: Using a mandoline cut lemon into thin slices.

Step 4: In a different medium bowl mix flour, garlic powder, and paprika. (prep for step 5 by putting margine or butter in the skillet to melt)

Step 5: Dredge the chicken first in the egg/lemon mixture and then in the dry ingredients and coat well.

Step 6: In the skillet brown the chicken in the margerine or butter.

Step 7: In the microwave boil water and chicken bouillion cubes. Once the chicken is browned mix chicken stock and remaining lemon juice and cappers into the skillet. Add a few lemon slices. (Save some to garnish at the end)

Step 8: Cover and let simmer for roughly 20 minutes or until chicken is tender.

Step 9: Start pasta. Angel hair pasta takes rougly 5-7 minutes to cook.

Step 10: Place pasta in a serving plater and dress lightly with olive oil. Place chicken on top and pour remaining liquid from the skillet over the chicken and pasta. Garnish as desired with lemon slices.