Social Icons

Showing posts with label Kayaking. Show all posts

Wednesday, July 8, 2015

Meigs Point Nature Center Canoe Trip @ Hammonasset State Park

Named after Johnathon Meigs a American Revolutionary hero and recipient of a congressional sword for the Battle of Sag Harbour, Meigs Point Nature Center offers a weekly 2-hour guided tour of the Hammonasett River. The tour is by reservation
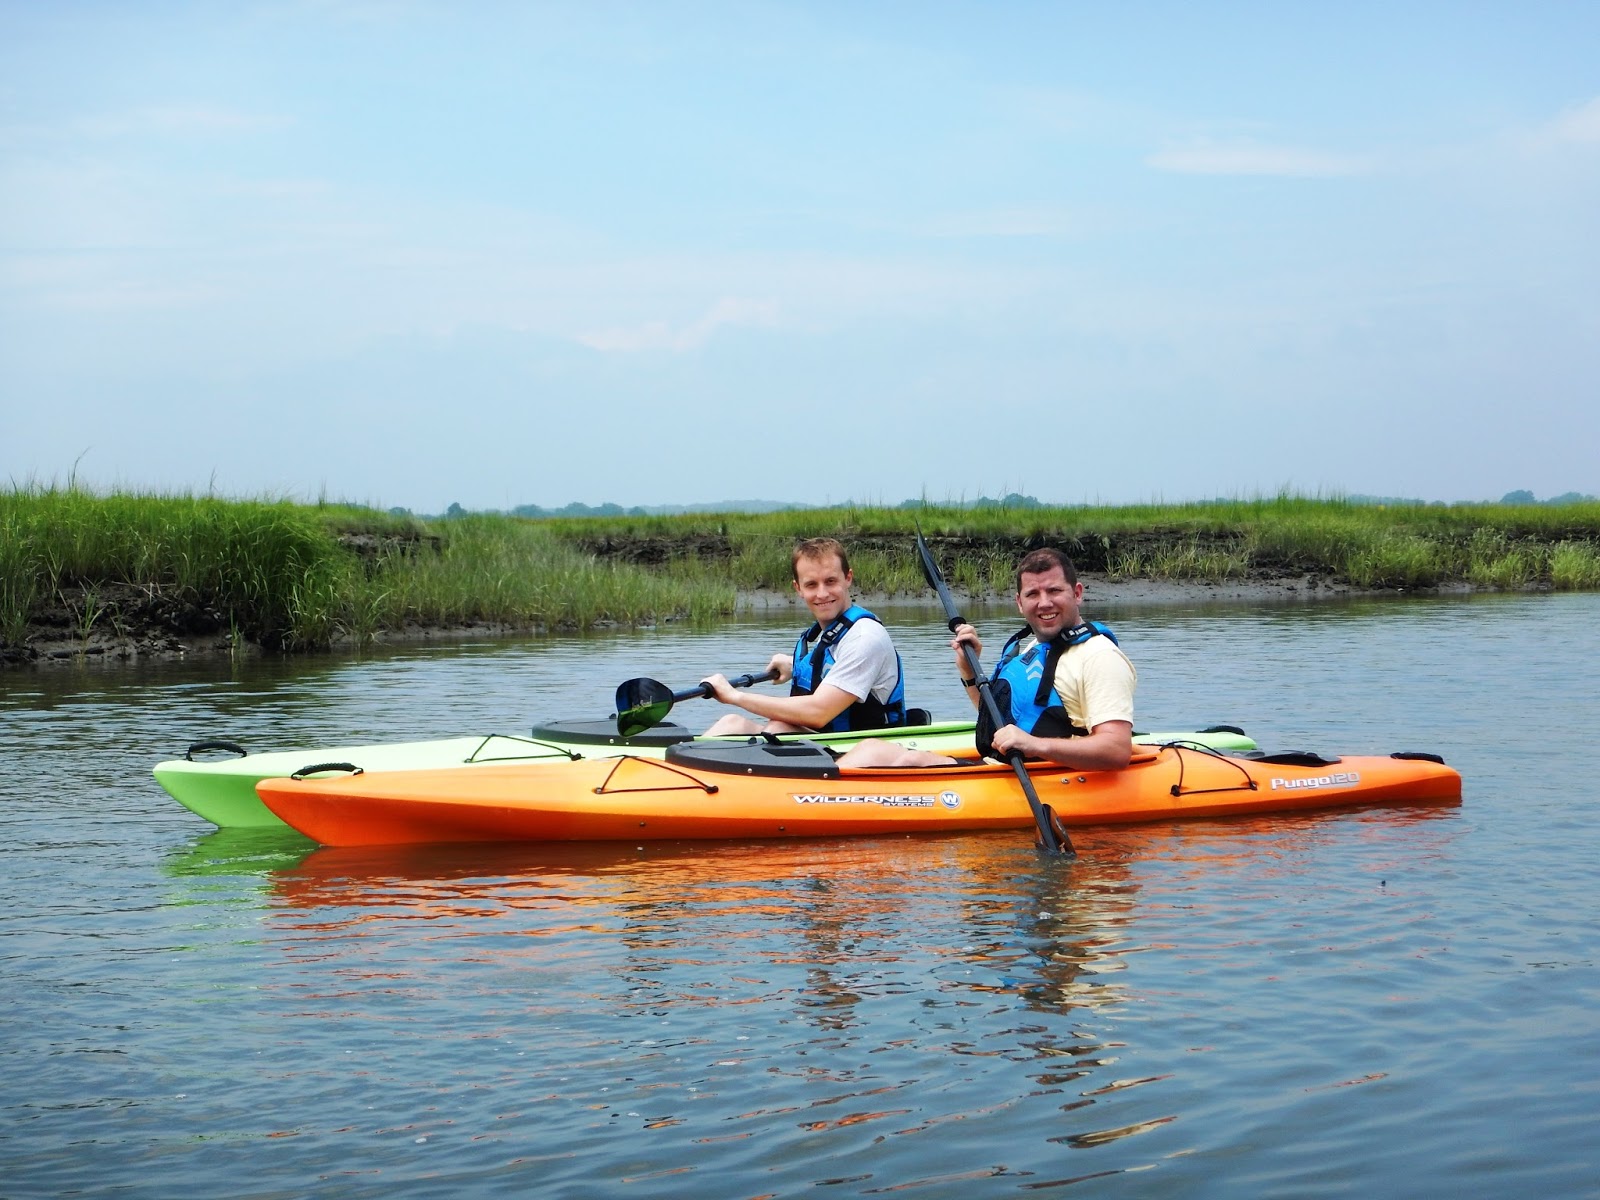
Dan and I brought our own kayaks for the tour while my parents reserved a canoe. The cost of the tour was $5 and departed at 12:30 from the Nature Center. After a brief drive down a trail we arrived at the launch zone. We were almost immediately uninvited by mosquito's and horse flys. Dan and I unloaded the Kayaks while tour leader Mike and his helper unloaded 9 canoes and related life jackets and paddles. As they reviewed safety rules Dan and I launched the kayaks to escape the attacking insects. 

Once on the water we were thankfully left alone and the first canoe to launch was my parents. Having canoe'd before they had no problem and we made our way out the small canal towards the Hammonasset River. As the remaining tour participants joined us we crossed the channel and followed the salt marshes with our tour guide Mike pointing out the various birds and other wildlife we encountered.  We traveled roughly 1.3 miles up river to the bridge at route 1. There Mike told us a story about the history of the area before we began the paddle back to the launch spot. 

It was a beautiful day on the water. When we reached the laugh ramp we quickly got the kayaks out of the water and on the roof rack.  We moved quick as the mosquitos and horseflies were still hanging out.   We thanked Mike the tour guide for the experience and headed out. 


Saturday, May 30, 2015

Kayaking Lake Boon

With the sun shining and having a rare day off I decided it would be a perfect day to go kayaking. Dan and I arranged a time with my brother and his family to check out Lake Boon. Lake Boon is a 163 acre lake located on the Hudson/Stow line.

Located a short distance from his house we loaded up the kayaks and their canoe. The lake is long and relatively narrow made up of four basins. 2 larger areas called Boon Pond and the Ramshorn Meadows as well as two swamp areas.  The meadows and swamp areas formed when a dam was built on Barton Road in Stow. The dam is a by-product of our industrial age.

We began our exploration from Dawes Lot located along Sudbury Road in the smaller of the two swampy areas.  From there we paddled along the shores of Ramshorn Meadows before passing through the Narrows into Boon Pond.

Many of the homes surrounding the lake are merely summer cottages while others have morphed into much more luxurious year round homes.  Historically Lake Boon was a hit amongst city dwellers who had once taken the train out to the area during the summer months and staying in lake side hotels. With the introduction of the car the Lake lost favor and today is surrounded only by homes.

With the sun beating down on us we all decided we would take a dip in the cool refreshing waters. I taught Dan and Grace how to exit their kayaks with out flooding it with water or capsizing. They each did a nice job. Chris pushed Aidan and Elyse off the canoe and into the lake with a splash. Those two are like fish they love the water so much.

We enjoyed the cool water and a chance to swim but after a short while we decided to get back underway. I quickly showed Dan and Grace how to reenter a kayak from the water without capsizing the boat while my brother taught Aidan how to reenter the canoe.

Once we were all back aboard we continued along heading for the dam. Having reached the other side of the lake we headed back. I could feel the sun since the dip in the lake had washed off my sunscreen but continued on.

The return trip seemed to go quicker and it wasn't long before we were back at the ramp. It was then we discovered Grace had taken her car key swimming and it was no lost to the depths of Boon Lake. We managed to get all three kayaks on the roof of my car and brought them back to my bothers while we decided what the best course of action would be. It all worked out after picking up her spare key and on the whole the day went great. Its a nice little lake to float around on and enjoy on a hot summer day.

Friday, August 15, 2014

Bearskin Neck, Rockport, MA

Bearskin Neck is a small neck of land that juts out of the town center into Rockport Harbor. According to legend has it is so-named for menacing bears that early settlers corralled onto the neck and hunted. Rockport's early fishing and granite industries made Bearskin Neck a busy commercial dock area owing to its convenience as a landing place. The tip of the Neck actually housed a fort during the War of 1812 which was fired upon regularly by British warships. Today the rocky end of the Bearskin Neck jetty offers a fine view of both Sandy Bay and the town of Rockport.

What really makes Bearskin Neck one of the principal attractions in Rockport however is the quaint little studios, shops, and restaurants that line its narrow roads. Bearskin Neck is also a bustling artist colony where one is just as likely to see an artist at his easel as a lobsterman hauling his traps.

The tiny studios and shops surround a famous old red fish house known as Motif #1. The "Motif" was originally built in 1884 and has had to be rebuilt several times due to the ravages of nature. 

In addition to the many little ships and galleries Bearskin Neck offers outdoor activities like Kayaking from North Shore Kayak.  They offer guided tours of the area from Memorial Day through mid-September. The colorful kayaks lined up in the water are likely second to Motif #1 being photographed.


Saturday, July 12, 2014

Kayaking to Old Saybrook's Breakwater "Outer" Light

I woke up to the sun shining and Long Island sound smooth as glass and decided it was a perfect day to kayak to the Old Saybrook Breakwater Light. I didn't load up the new roof rack for nothing and it was time to get the Kayaks in the water. The Breakwater light is known locally as the Outer Light and is one of two lighthouses marking the opening to the Connecticut River.

The Breakwater/Outer Light is the youngest of the two and was constructed 75 years after its older brother known as Lynde Point Light on a rocky jetty. I knew the history of the lighthouse well having watched its green flash in the distance every 6 seconds and when foggy a blast of the horn every 30 seconds. Many a night I watched its green light pulse from my bedroom window. It was lit for the first time in 1886 and stands at only 49 feet. While I have never been in it I am told it has 4 floors with a tiny staircase inside.

It had even made the local news when it was reported that it was to be sold by the federal government and the local town had been rumored to be interested in buying it. I don't think it actually happened however and I had heard that it was bought by a private family.

The lighthouse is a prominent feature along the shoreline and even graces the state license plate. It has survived numerous hurricanes and stands as a beacon to any who venture up or down the Connecticut river.


After a healthy breakfast I pulled the kayak's out and carried them down our new fortified sea wall to the beach which its self had survived many a hurricane until Hurricane Sandy did some damage a years ago.

Once in the water I began the roughly 2 mile trip along the Old Saybrook shoreline passing the Knollwood & Fenwood Pier's before paddling straight out to the Outer Light. The sea stayed calm and in no time I was bobbing around as I relaxed and took in the Light House.

A few guys had set up shop using the breakwater as a fishing spot. It was a little choppy since many boats were going up and down the river. The current was also keeping us moving. Having forgotten a hat and not put any sun lotion on we decided to head back. This time we must have been fighting the tide since the current made it more difficult to return. We opted to paddle along the breakwater and along the shoreline passing Katherine Hepburn's old summer cottage along the way. I have heard that the house is back on the market minus a portion of land for $15 million.

It took about 55 minutes to paddle back compared to the 35 minutes it took to get there and it was obvious we were both a bit tired and maybe a little burnt. Round trip it was 4.11 miles and took my just over an hour and 30 minutes to make the trip. I got some great pictures and enjoyed the paddle.

Monday, June 30, 2014

2011 Tiguan Roof Rack Decision

Getting a new vehicle comes at a cost. Not only do I have a car payment again but I’m faced with the added costs of a new roof rack should I want to use my kayak or take my mountain bike anywhere without jamming it inside the car.

The complication I had was finding a roof rack that wouldn’t impair my ability to open my panoramic sunroof when installed. Having had a Thule roof rack stolen from my previous car even with the security locks I wanted to check out all the other options.

I could pick up the OEM roof rack but it’s ugly and you are limited to the space between the feet and the heavy plastic shields which isn’t enough to allow me to take 2 kayaks and my bike with me at the same time. It is important that I am able to take multiple things with me when I go on small road trips. The OEM rack just doesn’t afford me the space and look I want.

Yakima offers several options for the Tiguans. The lowest cost option is the Railgrab. While it appears that this option will give me the clearance with the bar it’s hardly an attractive option. The round cross bar is boring and pedestrian in appearance. The second option is the Whisperbar rails system. These are really low profile and are a very attractive option. They seem to barely change the overall all appearance of the car when in use however the fit tips indicate that you should remove the bars before using the roof. I really want to be able to leave the base cross bars on the car and only remove the attachments when not using them. Since it doesn’t offer the clearance needed its out. The third and fourth options are the Whisperbar Through Bar and HD Bar systems but those aren’t for vehicles which already have the roof rails.

That led me back to Thule. Thule also had several options for my car. The base mounts for my vehicle were the same but the difference was the bars. The basic SquareBar’s are not attractive and also any attachments have clamps that hang below the bar.  I would need to be very careful not to open the roof when the bar is in use or risk dragging the roof down a jagged edge of a clamp screw. It does appear that the bar can stay on the vehicle while the roof is in use. The second option was the Aeroblade’s. The aeroblade also have the same t-track that allows many standard attachments to use the adaptor packs that keep the bar clamp free. That means no hanging clamps or screws that could damage the roof.  With the Aeroblades there are two options like the Yakima’s WhisperBars. They offer an integrated bar and foot pack or the separate bar and foot pack. The integrated AeroBlade Edge fit guy mentions that the roof may not be used with the bars in place.  The separate bar and footpack didn’t say it would impact the use of the sunroof.

Just to be on the safe side I went to the local Eastern Mountain Sports and took a bar outside and held it about the height it would be with the Rapid Crossroad foot pack’s and tested the roof. It cleared but not with a huge amount of space so we will have to see when the rack is fully loaded if it clears. I plan to install it this week and will add another post when I do.


Thursday, August 15, 2013

Task 1 - Visit Hawaii (The Tours)

My trip to Hawaii is coming up fast and still many things to do. The flight and hotel are booked and paid for. The extra camera gear I wanted was ordered and has arrived. New swimsuits and other clothes have been purchased. The packing list has been written. I even bought a new snorkel set to use at the beaches.

The hardest part being the itinerary of what to do and when to do it is nearly done all that is left is to finish booking the tours. It wasn't easy to decide what to see and when to see it and I decided to use the services of a tour company who has expereince on the island and whose track record and reviews demonstrate that they are a trusted resource on the islands for helping tourists cover as much ground and see as much as they can during their trips.

We selected 4 different tours to make sure we see as much of Oahu and Hawaii as possible.   Our tours are a tad out of order from how maybe they should go but in order to get everything done I had to get creative with the order.
  1. Tour one is something I really wanted to do and the others while not necessarily their first pick agreed to join me.  This excursion is a hike, kayak, and hike trip through Kualoa Ranch and out to Mokoli'i island also known as Chinaman's Hat by kayak. While out on the island we will enjoy lunch and an opportunity to explore the island and snorkel its shores.
  2. The second tour perhaps should have been the first since it really is a great way to get an introduction to the island of Oahu.  It includes a stop at Waimea Valley & Waterfalls, Kualoa Ranch, the beaches of Oahu's North Shore, Nu'uanu Pali Lookout, Halona Blowhole & Cove, Turtle Beach, Byodo-In Temple, Hanauma Bay amung other locations.
  3. The third tour we selected is the One-Day Hawaii Volcano Eco-Adventure to the Big Island to visit the Volcanoes National Park, Hilo Town, Rainbow falls, the Thurston Lava Tube, The Black Sand Beach and other attractions on the Big Island.  It will be a long day and much ground will be covered but it will be an adventure we won't soon forget. I am looking forward to seeing the lava flows.
  4. Our final scheduled tour is another long and very full day of exploration. It starts off with a somber reminder of Hawaii's role in WWII by visiting the Pearl Harbour Visitor's Center and the USS Arizona Memorial.  It is followed by a trip to the Dole Plantation where we will get the opportunity to explore its Pinaple Maze and possibly send a pineapple or two home to family. Next we take a Hoku Pa'a Canoe Ride at the Polynesian Cultural Center followed by a Ali'i Luau Buffet and a La'ie Town Tram Ride before enjoying the Traditional Ha: Breath of Life show.
The tours are not cheap and to help spread the cost rather then book them all at the same time we are going to the most expensive today and the rest later as we get a little closer. The most expensive tour is the one-day fly away to the Volacano National Park on the Big Island.

Friday, July 19, 2013

Mountain Biking & Kayaking Sans Roof Rack

I am aware that their have been no updates about my Mountain Biking & Kayaking activities. The reason is simple, I haven't really been doing much of either since my roof rack was stolen off my car this past fall.  The thieves didn't get away with everything but it was enough to render the rack useless. The stole the rear bar and mounting brackets and the fairing. The only thing that saved part of my Thule rack was the way the front bar mounted to the door frame. They couldn't get the rack off the steel grommets built into the car and thankfully they didn't try to pry the door open to free it.

I attempted to purchase the parts to make my roof rack whole directly from Thule but wouldn't sell me just the parts I needed. They told me they only sell the mountain brackets in sets of 4 and bars in pairs. Needing only 2 not 4 mounting brackets and 1 bar not 2 I was frustrated. Understanding that it prevents thieves from making full sets from stolen parts I offered proof that I purchased it all. The customer service person told me she would speak to her supervisor and get back to me. She never did.  Even more then the bad customer service I am angry that the locks on the Thule are so easily bypassed. In hindsight I can see how flimsy and poorly engineered the lock doors on the Thule roof racks are. A simple hard pull and the plastic lock doors pop leaving your expensive rack vulnerable to thieves. Given the flimsy lock doors on their products I decided I simply wouldn't buy a new rack from them.

I looked at other manufacturer's but they all are similarly priced and I just wasn't in a position to invest that kind of money on a new rack for a car that I may not have a whole lot longer.  I had all but given up until recently. When I saw a special on ECStuning.com for Roof racks specific to my car on sale and I am pleased to report that I sprung for a new.

Hopefully It will allow me to begin using my toys once more. The new roof rack is designed for specifically for my model VW and allows for easy installation and removal While it doesn't appear as nicely made as my previous Thule rack it will do the job. It too has locks but they seem not as secure as I would like and as such I plan to remove it between use and not leave it on the car as I had previously done with my Thule rack. I look forward to updating my blog with more adventures both on the trails and in the water soon.


Wednesday, June 26, 2013

Prepping for Hawaii - Nikon AW110 Waterproof Camera & Nikon D80 Additions

Well we are 3 month away from Hawaii and I decided that while I love my SLR camera It isn’t always the most convenient. There are often times when conditions prohibit the use of my favorite camera such as events where water is involved. Since much of my time in Hawaii will be spent either at the beach or doing some form of water related activity I thought it was time for me to spring for a waterproof camera.

I researched many different options and settled on the Nikon AW100. I picked it for a couple reasons. First, I have experience with the brand and am comfortable with the quality of their products both in build and performance. Second, the reviews speak for themselves. Who can argue when so many people have such great experiences? I am looking forward to getting this camera wet in the waters of Oahu.

I do plan to bring my SLR for those days and events where I prefer the performance of an SLR but this camera will be a great compliment. I also plan to be able to use it when I am Kayaking or Boating. Great way to get those shots without worrying about the water.

I also got a great deal online and only paid $184.95 for the camera which has a retail of $349.99 at Target. That leave me with enough extra to purchase a second battery, a case and a couple good high speed memory cards with plenty left over.


Update 7/11/13: So this camera is out of stock and the vendor informed me that it is back ordered and they expect it to ship in 2-4 weeks. Hopefully that is accurate and I will have it in time for my trip. If not I’ll end up paying full price for it at Target. Everyone knows I am not a fan of paying full price for anything. They also adjusted the price to 174.95 to the currently website price.

Update 7/23/13: The vendor informed me after calling that it is due to ship on Friday and they have upgraded my shipping from ground to 3-day air at no charge. Looking forward to trying the camera out soon.

Update 7/29/13: Vendor informed me after calling that they are having trouble sourcing the camera and that it could take a while to receive. I cancelled the order since I want it for the trip and didn't want to risk waiting for it.

Update 7/30/13: I purchased the camera on eBay. It is new in the box and unopened I am looking forward to receiving it and testing it out in the pool. I also ordered a floating strap and case for it as well. I did pay a little more then the online retailer's price of 174.95 but I know it will get here on time. I just need to purchase a second battery and Ill be satisfied I have everything I need/want.

Now that the camera is purchased and actually coming I thought I should pick up a float and case for the device. I don't want to risk dropping it an losing it in the water and when not in use I don't want it getting damaged. As such I purchased the Coolpix Floating strap and the Nikon Sport case. Both will be great additions to the new camera.

In addition to finally buying the AW110 I also picked up a few other items for my Nikon D80. Battery power is always something to be aware of and rather then worry about carrying an additional battery I purchased the MD-80 Battery grip for the d80. It will hold two batteries and double my camera's battery life. It does add weight to the unit but worth not having a battery flopping around in my pocket. It will be a great addition for those long day long tours where I want to make sure my camera will last all day.


Tuesday, June 18, 2013

Task 1 - Visit Hawaii

Task 1 - Visit 1 New State or Country: Oahu, Hawaii

While I have not yet gone to Hawaii the trip is booked and I am excited to go. I used money made from my part time job to finance this incredible adventure and I can't wait.

Step 1: Pick the Island: After researching where to stay I settled on Oahu and particularly Waikiki. I picked Oahu because it has many of the attractions that I feel are must see's while in Hawaii. It is also the state capital and home to the majority of Hawaii's population. I choose Waikiki because of its notoriety as the place to visit. Usually I prefer to be off the beaten path but for this trip I thought I would follow the herd.

Step 2: Pick the Dates to Travel: I know a few people who have or do live in Hawaii and asked what time of the year did they think it was best to travel there. They all thought that the fall was the best time because it was before the busy holiday season but after the kids all go back to school.  That left me traveling sometime from late September to early November.

Step 3: Pick a Hotel: I looked at alot of hotels on Waikiki from the Hilton Hawaiian Village, the Royal Hawaiian Hotel, to the Sheraton Waikiki and the Moana Surfrider. My critera was simple I do not want to have to cross Kalakaua Ave to get to the beach. I also didn't want to be right smack in the middle of the beach either where the majority of the crowds would be. As such I settled on the Sheraton Waikiki. Its ideal because I can get to the beach easy enough but also have the option to swim in its incredible infinity pool overlooking the ocean.

Step 4: Plan the Activities: Once the dates and hotel were locked down the fun part of planning what activities I wanted to do began. I decided that I wanted to do a few guided tours to to compliment the free time I would have on Oahu.
  1. To acclimate to the island I thought that an island tour would be ideal as an opportunity to see what was on the island and what we might want to go back and explore more.  I settled on Discover Hawaii Tours Ultimate Circle Island Tour.
  2. What vacation to Hawaii is complete with out visiting Pearl Harbour and the USS Arizona Memorial. To maximize seeing everything we opted to include that in addition to visiting the Dole Plantation and the Polynesian Cultural Center with an included Luau. Discover Hawaii Tours Pearl Harbour, Dole Plantation, Polynesian Cultural Center with Luau
  3. Being an avid fan of kayaking, hiking and anything really outdoors I picked a tour that would allow me to do all the things I wanted to do without torturing my travel companions. We would visit the film location for Jurassic Park as well as hike above the Kualoa Ranch fish ponds before kayaking to Chinaman's Hat. Discover Hawaii Tours - Chinaman's Hat Experience
  4. One final tour we have yet to settle on is a big one and would add a good deal of expense to an already pricey vacation. It's an opportunity to visit the big island on a fly away tour to visit the Hawaii Volcanoes National Park and rainbow Falls. We would get to see the most active volacano in the world and walk thought the Thurston Lava Tube. Discover Hawaii Tours - One-Day Hawaii Volcano Eco Adventure.
The rest of the vacation would be spent with out any planned tours or trips and we would get the opportunity to relax, enjoy the beach, and explore as we see fit.

Friday, September 7, 2012

Task 94 - Nashoba Paddler (Groton, MA)

Task 94 - Kayak 6 new places (2/6)

Location:   Nashoba Paddler
Distance:   6.08 Miles
Time:          2.30:08


Rating:       3-Stars

With the dog days of summer behind us and fall fast approaching we took advantage of the beautiful weather and decided to explore the Nashua and the Squannacook Rivers. Our journey began at Nashoba Paddler where we had scheduled appointment with the owner. (Note that after Labor Day you must schedule an appointment)

After paying for three hours in two old town kayaks we launched into the calm waters of the Nashua River and began our journey south towards the confluence of the Nashua and Squannacook rivers. Like most New England water ways the low the water levels were very noticeable. In addition to the low water levels the river was littered with downed trees many of which jutted out into the river.

If you are looking for excitement then this isn’t the river for you. If you are looking for a relaxing peaceful paddle down a lazy river then check it out. There wasn’t much to see along the river since it is flanked by conservation land and the Groton Town Forest with the exception of the Groton School Boathouse and a few bridges.

Along the river we saw a few fish and even fewer birds. We did get a treat and saw a huge snapper turtle with a shell that probably measured a good 14 inches. Sadly I couldn’t get a good picture of him since he quickly hid in the plant life at the bottom of the river.

Next, we stopped at the abandoned rail bridge and climbed up to get a different perspective of the river. The bridge was still structurally sound but showing its many years of neglect. It is a testament to the old days of transportation.

Just around the bend from the rail bridge was the confluence of the two rivers. The owner of Nashoba Paddler told us that if we explored the Squannacook River we would see nests (piles of river rock) built by the freshwater eels. It was interesting to see these nests and even more of a mystery of how they built them. While we didn’t see any eels we certainly did see lots of their handy work. Unfortunately the Squannacook river was barely passable from the start and with the fallen trees we didn’t manage to make it very far.

We continued a little farther down the river until we reached the Route 2A overpass. Having travelled a little more than 3 miles and 1.5 hours down the river we decided our hunger was getting the better of us and we would head back.

Our return trip was somewhat quicker since we made no stops or detours and we were travelling with the current. Overall it was a good day but I am not sure I would return. I thought that the price of 88$ for two people for 3 hours was steep for a river that lacked anything really interesting and equipment that was average at best. My kayak seat was damaged and could not be adjusted. Unfortunately I didn’t discover that until we were a mile down the river. We also returned to find no one at the shop and we were left padlocks to secure the kayaks. While we expected that since she had said she may not be there we didn’t like the responsibility of having to secure the kayaks and leaving the other equipment unsecured.